
Are you in between an Important Presentation or Meeting? And your Computer/Laptop embarrasses you every time by getting into the sleep mode, not understand that you are still in need of your computer/laptop? It is very obvious that, if we leave our Windows idle for a while, it goes into the sleep mode. If you need to use the System again, all again you have to type your Puzzled & Complicated Password and unlock the windows. This Article helps you solve the issue in 5 simple steps.
Sleep Mode helps the user to save their Power by getting into sleep mode, when their PC is not used. It helps the laptop users to preserve their Laptop battery power, when they not working on laptop.
Though the problem seems to be small, still these situations surely irritate us a lot. Well, you don’t have to get irritated or lose your mind anymore. As today, we will teach you on How To Change Sleep Mode Time In Windows 7 by increasing the amount of idle time necessary before your windows goes into sleep mode.
Steps on How To Change Sleep Mode Time In Windows 7:
STEP 1: Click on Start Button then goto Control Panel > Hardware and Sound > Power Options.
(Or)
Click on Start Button and in Search Bar type “Power Options” and open it.
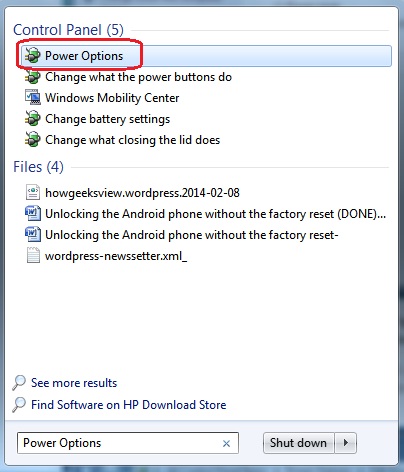
(Now you will see a list of Power Plans available for your system. The plan you are using currently will have a Blue dot highlighted on the radio button. )
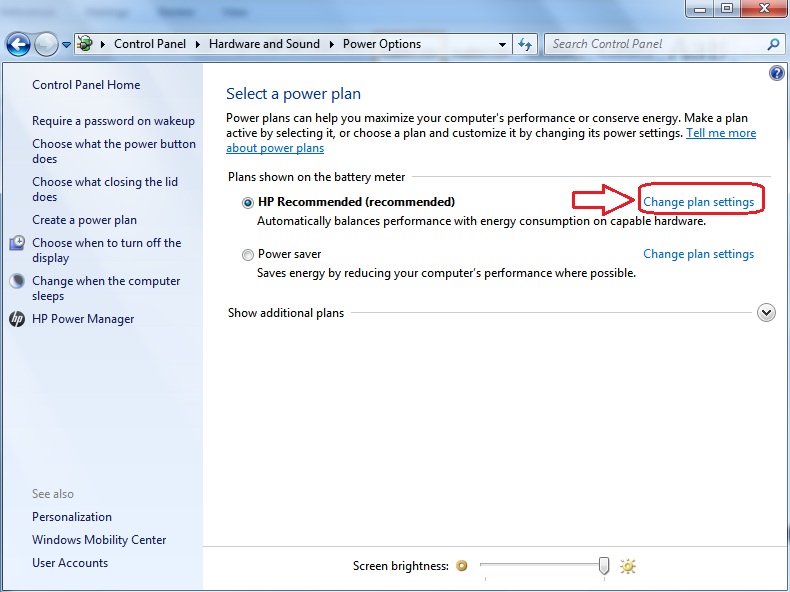
STEP 2: Now click on “Change Plan Settings” where Blue Dot is highlighted.
[NOTE: Laptop users will see two option “On Battery”, “Plugged-in”]
[Plugged-In means when your laptop is charging and your adapted plugged-in to your laptop]
STEP 3: Now click on the Drop-Down next to “Put the Computer to sleep:” and choose the option when your system needs to get into sleep mode.
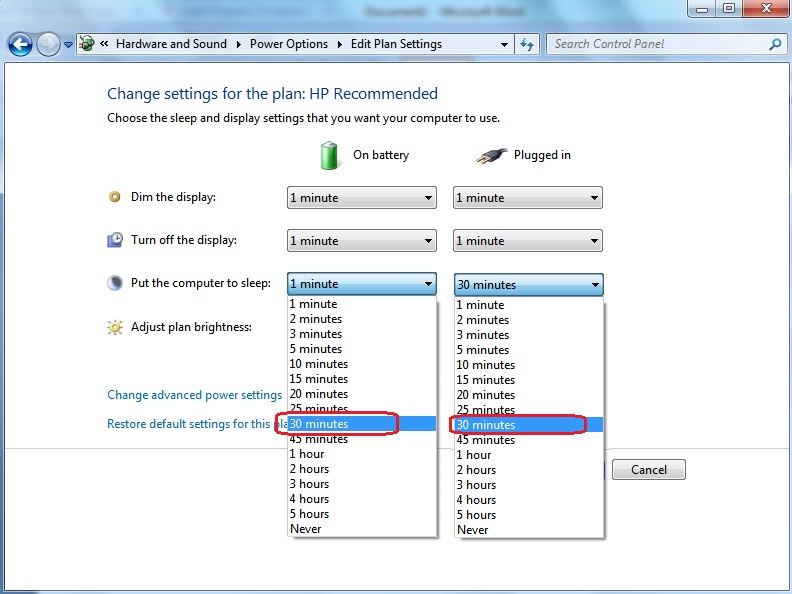
(In my PC, I have chosen 30mins. You are free to choose your own time).
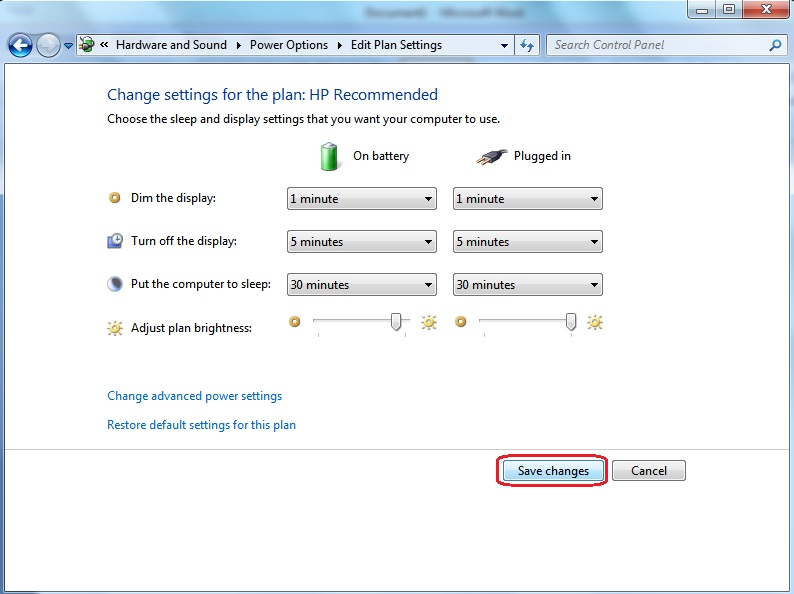
STEP 4: Once you have changed the Computer Sleep time, click on “Save Changes”.
STEP 5: That’s it; you have successfully changed sleep mode time in windows 7.
[If you have configured settings as above, then the System will get into sleep mode after 30mins of idle time.]
Well, you have successfully learnt How to Change Sleep Mode Time in Windows 7. Now At any time, you can change the sleep time of your PC/Laptop & the best part is you don’t have to get embarrassed or lose your mind anymore J .